Paper Creations
| Instant wiki maker | Making handouts | Editing tips |
Contents
- 1 Student worthiness
- 2 Primary biological content area covered
- 3 Materials
- 4 Handouts
- 5 Word bank
- 6 Description of activity
- 7 Lesson plan
- 8 Potential pitfalls
- 9 Math connections
- 10 Art connections
- 11 Literature connections
- 12 Connections to educational standards
- 13 Next steps
- 14 Reflections
- 15 Citations and links

Biology In Elementary Schools is a Saint Michael's College student project from a course that ran between 2007 and 2010. The student-created resources have been preserved here for posterity. Link under 'toolbox' for printer-friendly versions of the exercises. Click on handouts to print full resolution versions. Please see Wikieducator's disclaimer, our safety statement, and the Creative Commons licensing in English and in legalese.
Student worthiness
"Tried and Trusted"
Primary biological content area covered
- to have the students understand the importance of trees
- pose a hypothesis and use the scientific method.
- to have students understand the process of recyclying
- to show and explain to the students how important recycling is to our environment and our everyday life!
Materials
Materials teacher will need
- Ordinary kitchen blender
- Warm Water
- Recycled or scrap paper/construction paper
- A section of window screen (the section should be slightly larger then the paper you would like to make)We used a circle screen. This screen in particular was placed in between two circular frames where it was held for the duration of the activity.
Note: We placed our screens in embroidery rings in order to keep them tight. We highly recommend it! It made it much easier.
- blow dryer is necessary if you are pressed for time(to help the paper dry)
- Water bin/basin or tub (large enough to fit your screens horizontally)
- Paper towels or regular bath towels
optional material
- Glitter, flowers, thread, or leaves (depending on how creative you want your paper to be)
Handouts
If there are simple written instructions that students would use during this activity they should be placed here and they can be cut and pasted into a word processing document for printing. If there are mechanisms within this web format to upload more complex documents with diagrams, we will learn as we go.
Word bank
Mixture - solution of fibers and water, with the possible addition of glitter, flowers, thread, or leaves that make up a piece of paper.
Fibers- a course material made by compressing layers of paper or cloth.
Description of activity
In this activity students will create their own paper.
- Students will be asked to create their own hypothosis about how we make our own paper and what will happen during our experiment. They will also be asked to talk about how trees are a part of the environment.
- Then the students will start the experiment by ripping up many different types of recycled paper into very small pieces so that the fibers are exposed. Next they should place the paper in a blender. The students should then add water and blend the two together(the blender should be filled with 2/3 water and 1/3 paper!).
- Once the paper and water is blended together the students should have a smooth mixture. The mixture that they create should then go into a tub filled with warm water (it is important to remember that the tub should be big enough to fit the screen but not so big that it dilutes the water/paper mixture).
- Then the students will place their screens into the water at an angle. Once the screen is in the water students should gently move their screen back and forth so that the mixture of paper is spread out evenly across the screen. Once students have done this they should pull their screen straight out of the water.
- Then the students should hold the screen over the tub for about 30 seconds so that some of the extra water can sift through. Next the students should place the screen on top of the countertop where they should lightly pat down the paper with paper towels to get rid of the excess water. A teacher should be able to help the students use the blowdryers so that the paper will dry faster.
- Once the mixture of paper is dried, the students should be able to peal the paper from their screens and have their own recycled paper.
Lesson plan
The Lesson should take about 20 min:
- First introduce yourself to the class and ask them what they think recycling is and what it means to them.
- Then ask the students what they think is going to happen during the experiment. Based on this question and the previous one Try to form a hypothosis.
- After that talke about trees and the importance of them in everyday life. Also ask the students what materials can be recycled, and why it is important to recycle
- Tell the students about the activity and how to do it. Its best to set up the materials beforehand.
- Then proceed with the activity that is described above in the description of activity paragraph(students created their own recycled paper by ripping up the paper into bits and pieces and then placing it into the blender with water and mixing it together...)
- note: the kids should be able to choose what they want in their own paper mixture such as glitter, plants, food coloring, color paper, exc.
- After all of the mixing, sifting and drying the final product should be the recycled paper that the students can bring home(since some of the paper may not completely dry, we found it best to have blow dryers on hand to speed up the process.)
- Once the activity is finished have the students help to clean up.
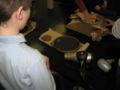
paper

Potential pitfalls
There are some definate pitfalls involved. First off we do not know the exact amount of water that we should be pouring into the blender. We should run some more experiments and come up with a concrete number. If we have too much water it will take forever for the paper to dry and the mixture will end up being too thin as well. However if there is not enough water involved the mixture will be way too thick and the end result will be a very clumpy piece of paper! The drying method of using blow dryers is very slow and we need to speed up that process in some way! Using paper towels to help the drying process is very helpful. Patting them lightly against the paper helps to absorb more water and make the paper dry faster however at times if you pat the paper towels too roughly against the wet paper it rips the wet paper....
Math connections
Students will be using math to add and subtract the amount of water they will need in relation to the amount of paper. They will measure the amount of paper that goes into the blender and then graph it on a chart. After they graph the amount of water and the amount of paper that goes into the blender they will create their paper. Once the paper has been created they will weigh it and discuss the relation between the weight of the paper and how much material went into it.
Art connections
Students will be demonstrating skills in the visual arts catagory of perfom and communicate by participating in group art activities. They will be demonstrating the creating art by handling and using elements of 2D design. They will also be able to creativly decide what to put in their own paper (glitter, flowers, thread ect.) Students will also be able to critique what they did and what they saw. They will also be encouraged to ask questions about the work that they did.
Literature connections
We are going to read the book, "The Giving Tree" by Shel Silverstein which talks about how a tree can give things to people, and how important trees are to our lives. Though the book does not directly mention recycling or biology, it is our hope that through guided questions students will be able to understand the importantance of trees at that level.
Connections to educational standards
7.1 Students use scientific methods to describe, invistigate, explain phenomena, and raise qestions in order to:
- generate alternative explanations-hypothese-based on observetions and prior knowledge;
- design inquiry that allows these explations to be tested;
- make and communicate conclusions, generating new questions raised by observations and readings.
7.2 Students design and conduct a variety of their own investigations and projects;
- questions that can be studied using the resources available;
- data that are collected and recorded in ways that others can verify.
7.11 Students analyse and understand living and non-living systems (e.g. biological, chemical, electrical, mechanical, optical) as collections of interrelated parts and interconnected systems.
7.16 Students understand how natural resources are extracted, distributed, processed , and diposed of.
Next steps
After the activity we realized that some of the materials worked better than others. The food coloring was completely unnecessary, the students didnt want to use it. The glitter and the leaves however worked really well. The kids really liked all the different colors of glitter available and every single group used the glitter and leaves to help make their own piece of paper more original. If we had more time we could have talked a lot more about the environment and the tree cycle and different types of trees. The students might find it interesting to learn about different types of trees and to talk about some of the trees that they already know about!
Reflections
After the activity it was overall a very positive outcome and experience! The kids seemed to be engaged in it and really liked the outcome of the paper they created. The whole activity worked pretty well and the students really enjoyed the fact that they could decide what actually went into their individual piece of paper (glitter, leaves).What was unexpected was how difficult the actual drying process seemed to be. We had three blow dryers to start off with and two of them died halfway through the activity. The paper towels were not that effective and if the kids patted them too roughly against the wet paper it would cause the paper to rip. So we managed to get regular bath towels and that seemed to fix the situation and worked pretty efficiently.The students surprisingly had a lot of prior knowledge about recycling and where paper comes from. They also had a good idea of what gets recycled and why it is important to recycle. They had already read the giving tree the previous week in school, so for them to recycle paper was perfect timing! The drying process would be the only thing that we would really change. Also we think as the teachers we should have been a little more organized and set specific parts for each person to do to make the lesson plan run more smoothly. We also should have chosen a different book because the kids had already read the giving tree the week before and did not seem to interested in reading it a second time (this might not be the case in all classrooms). But overall it was a very positive experience and the students seemed engaged and interested in the experiment the whole time!
Citations and links
http://education.vermont.gov/new/html/pubs/framework.html
http://education.vermont.gov/new/pdfdoc/pubs/grade_expectations/arts/visual_art.pdf
http://education.vermont.gov/new/pdfdoc/pubs/grade_expectations/math_reading_writing.pdf
Check out these other cool websites that explain paper making!