Beans in a Bag
| Instant wiki maker | Making handouts | Editing tips |

Biology In Elementary Schools is a Saint Michael's College student project from a course that ran between 2007 and 2010. The student-created resources have been preserved here for posterity. Link under 'toolbox' for printer-friendly versions of the exercises. Click on handouts to print full resolution versions. Please see Wikieducator's disclaimer, our safety statement, and the Creative Commons licensing in English and in legalese.
Student worthiness
This project is new and has been tested. The experiment work and seemed to be successful in achieving the stated goals. The growth of the beans was able to be observed and recorded easily.
Primary biological content area covered
The primary biological content covered in this lesson is following the growth of plants and different factors that contribute to it, such as water, sunlight, temperature and the importance of plant food.
Along with this, the students will be able to understand the plant germination process as well as experimental science, which includes the scientific process. This experiment could be slightly modified in numerous ways to test and examine other factors that affect plant growth.
Materials

For each group of students (See Figure 1):
- 2 small Ziploc bags
- water
- water mixed with fertilizer (when mixing, make sure to follow instructions on the package)
- 2-3 black bean seeds
- paper towels
- 2 labels
- masking tape
Handouts
Description of activity
Beans in a Bag is a science experiment designed for first grade students to help them understand the scientific process as well as observing plant growth. The students will have 2 Ziploc bags, one with beans and water and another with beans and water mixed with fertilizer (called plant food). After the bags have been assembled, they will be hung up on a window (using tape). The students will observe the plant growth over a course of 2 weeks (See Figures 2 and 3). This will be done by drawing what they see, every other day. These observations will help the students to see the difference in plant growth due to the fertilizer or lack of fertilizer. How to grow beans in a bag.
Lesson plan
This activity is planned to take approximately 20 minutes and can easily be adapted to meet the needs of all students in any classroom.
Before the students begin the experiment, the teacher and students should engage in a discussion about plant growth as well as forming a hypothesis about which plant will grow to be taller (See Figures 4 & 5).
- First, mix a fertilizer (Miracle Grow for example) with water. Place this solution into a spray bottle. Also, place untreated water into a spray bottle. Label the bottles so the children understand the difference. Labeling the bottles is important to distinguish between the different water mixtures and help the children to understand the differences between the two.
- Next, give every group of students 2 bags. These bags should be labeled with the group's name and bag number. For example, bag 1 can be the bag with water and bag 2 can be the bag with water and fertilizer.
- Once the bags have been labeled, hand the children between 2 to 4 (for example, black beans) per bag.
- Hand the children two pieces of paper towels, which have been cut small enough to fit in each Ziploc bag.
- Have the children use the spray bottle to spray 1 of the paper towels with the untreated water so it is wet, not soaked. This paper towel should then be placed into the bag. Repeat these steps with the water and fertilizer solution for the other paper towel and bag.
- Next, have the students place the beans inside the bag, in-between the bag and one side of the paper towel. Do this for both of the bags.
- The last step is to use tape and have the students hang their bags on any wall, or cabinet. Windows can be used in the warmer seasons (See figures 6 and 7 for completed project).
- Over a course of two weeks, the students will then observe the beans (See handout), and draw what they see. These observations will be used in a discussion about the growth of plants. This can include the importance of fertilizer (plant food).
- Beans in a Bag Photo Gallery
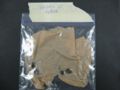
Figure 2. The final product of seeds grown with tap water; click to view closer.
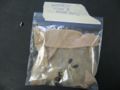
Figure 3. The final product of seeds grown with plant food; click to view closer.
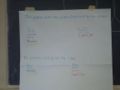
Figure 4. One example of a hypothesis; click to view closer.
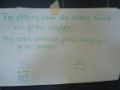
Figure 5. Another example of a hypothesis; click to view closer.
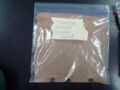
Figure 6. Example of finished product of seeds with plant food after day 1; click to view closer.
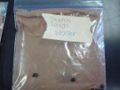
Figure 7. Example of finished product of seeds with water after day 1; click to view closer.


Potential pitfalls
There are a few problems that may occur during this project. One problem is that due to the cold weather, the plants cannot be taped to the window because the cold will prevent them from growing. The fact that the bags will be taped to a wall may change how the plants would normally grow. A second problem may be that no matter the conditions, the plants may not grow and there will be no experiment for the children to observe.
Math connections
Students may connect this lesson to math by using a ruler to measure the height of the plants as they are growing. They can also use chart paper to chart the growth of the plants and compare the heights of the plants in tap water versus the plants in fertilizer and water.
Literature connections
- There are a few possible books that can be linked and associated with the science experiment.
One of the books that was used during the lesson was The Giant and the Beanstalk. This is an adaptation of the story Jack and the Beanstalk. The story tells of a giant and his quest for his missing hen, while mentioning and using a beanstalk as a means of transportation between the "Giant Kingdom" and the "human world".
Stanley, D. (2004). The Giant and the Beanstalk. New York: Harper Collins.
- Other books involving seeds and plant growing can be used as well such as A Handful of Seeds, which is a story of a little girl discovering the importance of seeds and survival.
Hughes, M. (1996). A Handful of seeds.
Connections to educational standards
Vermont State Educational Standards (Pre-k through grade 4)
7.1- Students use scientific methods to describe, investigate, explain phenomena, and raise questions in order to:
- Generate alternative explanations — hypotheses — based on observations and prior knowledge;
- Design inquiry that allows these explanations to be tested;
- Deduce the expected results;
- Gather and analyze data to compare the actual results to the expected outcomes; and
- Make and communicate conclusions, generating new questions raised by observations and readings.
7.13- Students understand the characteristics of organisms, see patterns of similarity and differences among living organisms, understand the role of evolution, and recognize the interdependence of all systems that support life.
Mater Christi Core Standards for Science in Grade One
Core standard number four explores the concept of the necessity of light for plants to survive. Students will comprehensively understand this core standard through this experiment by testing the factors which enhance plant grow. Students will have the ability to tape the bag of beans to any surface and in turn will see the differences in growth which are apparent between the bags. Students will activate prior knowledge while discussing the experience and will in turn support their comprehension of the subject.
Next steps
Once the experiment has concluded the students have the opportunity to bring their beans home with them. Once home the beans can be taped to a wall (or window depending on the temperature outside) and the students can watch as the beans grow. As the students watch the beans grow the opportunity to learn about the growth cycle of plants presents itself. Students can also graph the growth of the beans on a chart which will help to develop their math skills, and they can draw pictures of the plants growth which will help to improve their fine motor skills.
As a continuation of this experiment, the students could dissect the bean seeds. The students could compare how the inside of the seed looks after it has started growing versus before it started growing. This would give the students an idea of what parts of the seed are used to help the plant grow.
Reflections
Overall, our experiment went well and was well received. We found that with a group as young as first grade, if you do not have a lot of help it could become a problem. Luckily, with three of us working together, we usually had one adult per group of students. The students can get very impatient and this could cause problems if not handled correctly. We did not expect the students to have an understanding of the scientific method. All the students knew what a hypothesis was, and we were very impressed by this. Based on their age, we were shocked they knew as much as they did. It was also really good that we had a book with us because some of the groups completed their activity really quickly leaving extra time and we didn’t want them to just be sitting there waiting to go to the next station.
Citations and links
Bean Plant Experiment This sight was useful in the process of creating our experiment.